News & Press
Gearing Up For Specialist Gear And Worm Tooth Form Manufacturing With Holroyd Machining Centre

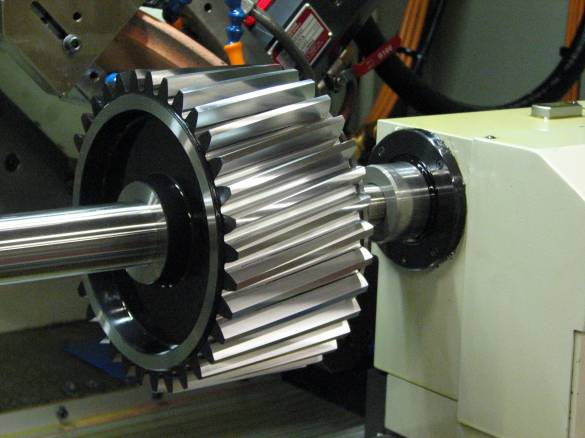
One of Europe’s leading producers of helical and spur tooth pinion gears has selected a GTG2 gear grinding centre from UK-based Holroyd Precision to test grind a wide range of specialised gears and tooth forms.
Developed for one-off or batch grinding of precision spur and helical gears, worms, screws and rotors of up to 350 mm diameter and 160 mm gear face width, Holroyd GTG2 machining centres use what is believed to be a wholly unique machining system to achieve accuracy to DIN 2 levels and beyond.
“The customer required a machine capable of grinding a variety of gears to the most exacting tolerances,” comments Holroyd Regional Sales Director, Steven Benn. “Products to be manufactured include spur and helical gears; gears with end tip relief and root fillet radius; worm tooth forms such as ZA, ZI, ZK and ZN; worms with sunken tooth forms; dual lead forms and both cylindrical and tapered roots. The GTG2 was selected for its versatility, reliability and uncompromising levels of accuracy – the latter achieved through high levels of onboard machine intelligence and a machining process developed to compensate for Helical Twist, a condition that occurs when helical gears are ‘lead crowned’ to improve meshing and reduce noise and wear.”
Complex yet simple
Incredibly sophisticated, yet exceptionally easy to operate, GTG2 gear grinding centres combine extreme rigidity with high power for either CBN or conventional deep grinding operations. Set-up is rapid for optimized productivity, while a highly intuitive user interface assists component production from initial design drawings.
“As with every Holroyd machine tool design, our aim is to exceed the objectives we started with,” adds Steven Benn. “Accordingly, our own test results and – more importantly – user feedback confirm that the technology used in GTG2 machines has surpassed expectations. Although the GTG2 is designed to provide DIN 2 levels of accuracy, it has generally exceeded this benchmark, achieving its ‘best ground’ performance with a tooth profile of DIN 1.”
The exceptional capabilities of GTG2 gear grinding centres can be attributed to a design that combines high levels of machine intelligence with onboard features such as automatic coordinate adjustment, in cycle wheel dressing, integrated profile management and coordinate measurement. All gear, worm and spline profiles can be verified using the integrated Renishaw probing system, enabling automatic on-machine corrections to be made if necessary.
Compensating for Helical Twist
Helical Twist is a condition that occurs when helical gears are ‘lead crowned’ to improve meshing and reduce noise and wear. Lead crowning varies the amount of material removed from the flank of a tooth across the face width, by causing the tool motion to deviate from a true helix. The problem is that ‘in form’ grinding has the undesirable effect of causing the profile of the tooth flank to vary across the face. Particularly in high precision and low noise applications, this affects gear wheel performance by concentrating loads on particular areas of teeth during meshing.
The GTG2 machine corrects this problem by calculating and controlling additional motions of the grinding wheel during the grinding operation, using dedicated software written by Holroyd engineers. In the machining process, the workpiece is rotated about its axis and the tool moved so as to vary the angle of inclination of its axis relative to the axis of the workpiece. As a result, generating errors are reduced along each line of instantaneous contact between the tool envelope and groove surface being machined. The result is better tooth contact during meshing and improvements in torque transfer efficiency.
Although carrying out a highly complex operation, the technology used by GTG2 gear grinding centres is extremely user friendly. The machine is easy to programme, set up and use. Features include an Integrated Profile Management System and an advanced Touch Screen Interface which allows the operator to take a typical design drawing and enter the coordinates directly into the machine. By extracting data from the onboard Renishaw probing system, the GTG2 is able to predict any minute alterations in the profile of the grinding wheel to achieve a precise result. Where a workpiece fails to meet tolerance requirements after a first grinding pass, the machine calculates the adjustments needed to grinding wheel form or axis position, transmitting the data on to a 2-axis CNC wheel dressing system to achieve automatic, on-machine dressing of the grinding wheel, all to ensure precise and effective gear grinding. Typical applications include: high-performance aerospace, automotive, precision motion, low noise and master gears.


